
>>

A luscious layered dessert that combines silky cheesecake and tender red velvet cake finished with a classic cream cheese frosting. Perfect for holidays and celebrations.
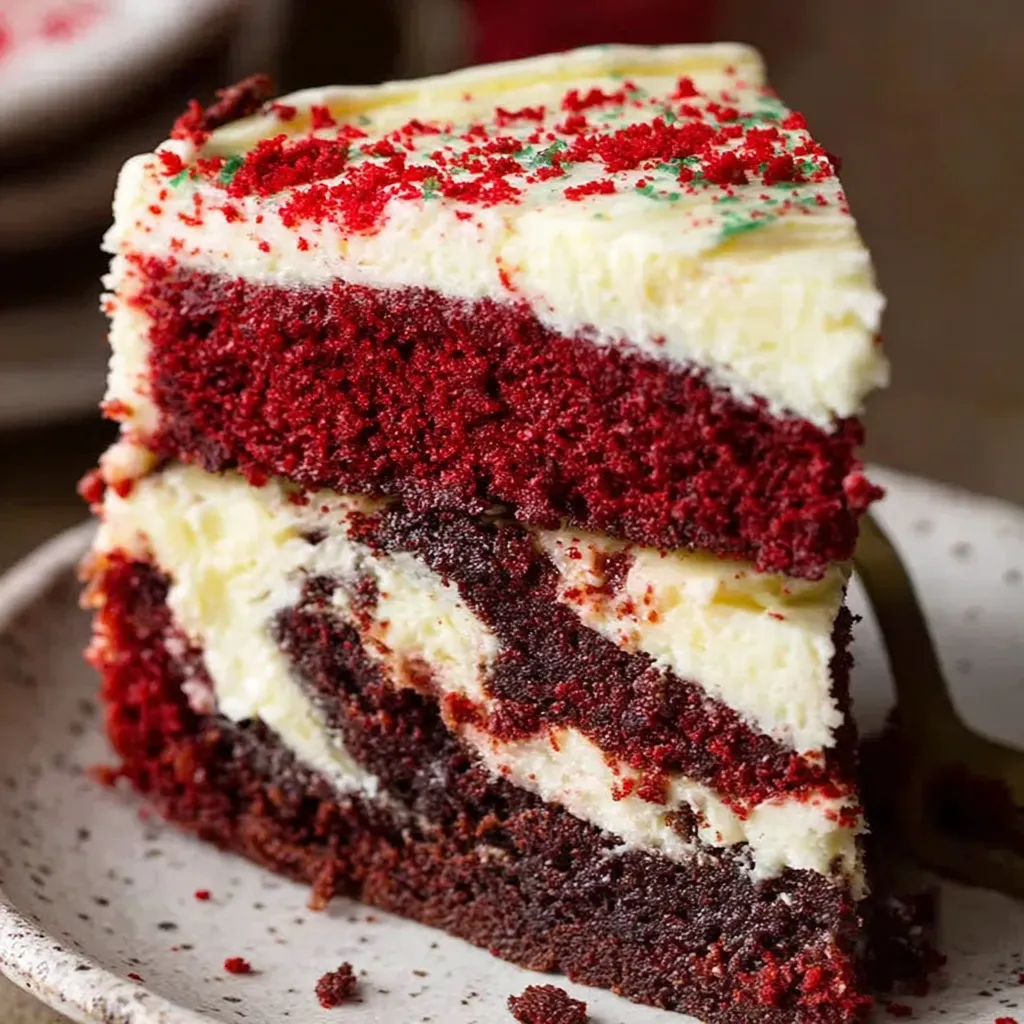
This Red Velvet Cheesecake Cake has been a celebration centerpiece in my family for years, the kind of dessert that makes the room feel instantly festive. I first discovered this combination one winter when I wanted something that felt indulgent but still familiar. The contrast between the velvety red cake and the tangy cheesecake center is exactly what makes this dessert memorable. The cake crumb is moist and tender, with a hint of cocoa that deepens the red velvet flavor while the cheesecake layer is silky, rich, and just sweet enough to balance the cake.
I remember the first time I served this at a family gathering. My uncle, who rarely takes seconds, went back for another piece and then again for dessert the next day. The texture is the star here. When you slice into the fully cooled cake you can see the clean line between the creamy cheesecake and the red velvet crumb which makes it ideal for special occasions. The frosting adds a soft cream cheese finish and a smooth sweetness that brings everything together. This version uses pantry friendly ingredients and a simple assembly that feels fancy but is very achievable at home.
In my kitchen I often swap vegetable oil brands and prefer a neutral oil like canola for a clean flavor. I also like to use a good quality cream cheese such as Philadelphia for a reliable, tangy finish. Family members always comment on how the cheesecake layer makes each bite feel luxurious which is why this dessert remains a go to for birthdays and winter holidays.
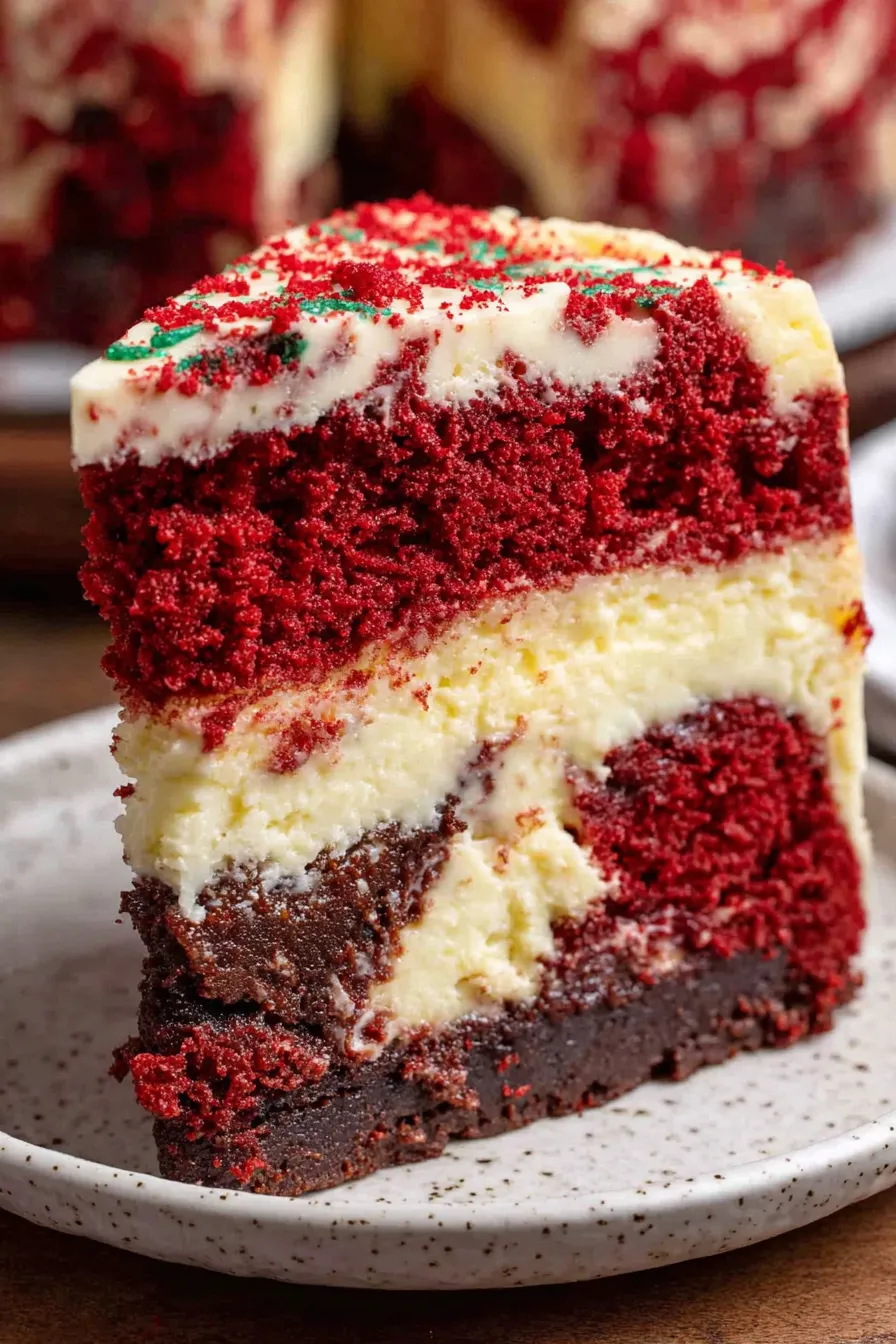
What I love most about this layered dessert is how reliably it brings people together. I have lost track of the number of times a second slice was offered across the table. The cheesecake center is the surprise everyone mentions and the frosting gives a classic finish that keeps both adults and children happy. The technique of layering batter with dollops of cheesecake is forgiving which makes it ideal for home bakers who want showstopper results without complicated steps.
Store leftovers in the refrigerator covered with plastic wrap or in an airtight container for up to four days. For the best texture avoid leaving the cake uncovered because the crumb will dry out. For longer storage wrap individual slices in plastic wrap and place them in a freezer safe container for up to three months. To reheat, allow frozen slices to thaw overnight in the refrigerator and then bring to room temperature for thirty minutes. If you prefer a warm slice, heat gently for twenty seconds in a microwave on low power to avoid melting the frosting.
If you need to swap ingredients use full fat Greek yogurt in place of sour cream at a one to one ratio. For a dairy free version use dairy free cream cheese and a plant based buttermilk alternative such as almond milk plus one tablespoon lemon juice, though texture and flavor will differ. You can replace oil with melted unsalted butter for a richer crumb but reduce the oven time slightly because butter browned notes accelerate browning. If you do not have red gel coloring concentrate the color by using gel rather than liquid food coloring for a vivid hue.
Serve slices with a dollop of whipped cream and a few fresh raspberries for bright contrast. This cake pairs well with a robust coffee or a light dessert wine such as Moscato. For holiday presentation cut into squares and arrange on a platter with sprinkles around the edge. For birthdays add piped rosettes using the remaining frosting and top with edible glitter or seasonal sprinkles for a festive touch.
Red velvet has origins in Southern American baking and became widely popular in the twentieth century. The characteristic red color originally came from the reaction between natural cocoa and acidic ingredients such as buttermilk or vinegar. Over time food coloring became the standard for achieving the dramatic red look. Combining red velvet with a cheesecake center is a modern interpretation that blends classic American cake traditions with creamy custard style fillings for a layered dessert that appeals to contemporary palates.
In winter decorate with red and white sprinkles and candied cranberries for a holiday feel. In spring serve smaller squares topped with edible flowers and fresh berries. For summer parties reduce frosting sweetness slightly and add a lemon zest to the frosting for a brighter finish. For Valentine celebrations shape the slices into hearts or use a heart shaped cookie cutter for individual servings.
Bake the cake one day ahead and store it wrapped in the refrigerator. Prepare the frosting the morning you plan to serve for the freshest texture. If transporting, chill the frosted cake for at least thirty minutes to set the frosting and then use a cake carrier. For buffet style serving pre slice and chill slices on a tray and cover tightly to keep slices neat and easy to distribute.
This layered dessert is a keeper that makes ordinary days feel special and formal occasions feel a little more homey. Try it once and I expect it will become a familiar request from friends and family.
Bring all dairy and eggs to room temperature for a smoother batter and an even bake.
Do not overmix the batter after adding dry ingredients to keep the crumb tender.
Chill the cake briefly before slicing to achieve clean edges and neat presentation.
This nourishing red velvet cheesecake cake recipe is sure to be a staple in your kitchen. Enjoy every moist, high protein slice — it is perfect for breakfast or as a wholesome snack any time.
Yes you can use Greek yogurt instead of sour cream at a one to one ratio. The crumb will be slightly tangier but still tender.
Wrap slices individually in plastic wrap and place them in a freezer safe container. Freeze for up to three months.
This Red Velvet Cheesecake Cake recipe makes perfectly juicy, tender, and flavorful steak every time! Serve with potatoes and a side salad for an unforgettable dinner in under 30 minutes.
Beat cream cheese and sugar until smooth. Add flour and vanilla then the egg. Mix on low until just combined and set aside.
Preheat oven to 350 degrees Fahrenheit. Spray and line a 9 by 9 inch pan with parchment then spray the parchment.
Whisk flour cocoa powder baking powder baking soda and salt until evenly combined and free of lumps.
Whisk oil sugar vinegar eggs sour cream buttermilk and red gel coloring until smooth and evenly mixed.
Gently fold the dry mixture into the wet ingredients with a rubber spatula until just combined and no streaks remain.
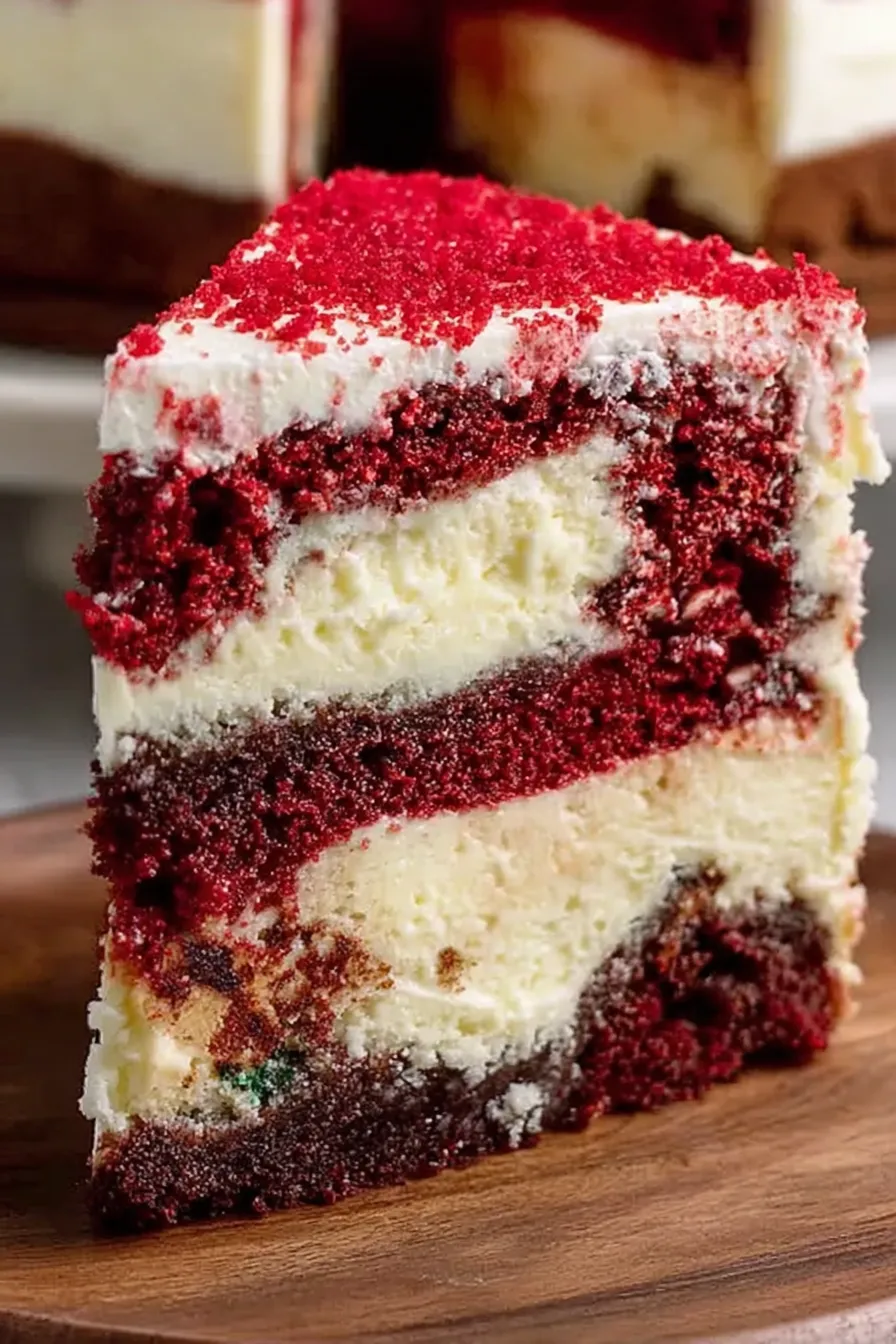
Spread half the batter into the pan, dollop the cheesecake batter and spread evenly, then top with remaining batter and smooth.
Bake for thirty to thirty five minutes until a toothpick inserted into the center comes out clean or with a few moist crumbs.
Let rest in the pan for ten minutes then transfer to a wire rack and cool completely before frosting to ensure the frosting sets.
Beat butter then add cream cheese. Gradually add sifted powdered sugar then vanilla. Spread over cooled cake and decorate with sprinkles.
Last Step: Please leave a rating and comment letting us know how you liked this recipe! This helps our business to thrive and continue providing free, high-quality recipes for you.
Leave a comment & rating below or tag
@forkelle on social media!

Thick, fudgy chocolate chunk brownies crowned with gooey mini marshmallows and a quick-set chocolate frosting for an irresistible, crowd-pleasing treat.

Buttery shortbread meets a gooey, brown-sugar pecan topping in these quick pecan pie bars. Just 10 minutes to prep and perfect for sharing.

Silky, crack-free pumpkin cheesecake with warm spice, buttery graham crust, and optional caramel and rum-kissed whipped cream. Your effortless holiday showstopper.
Leave a comment & rating below or tag @forkelle on social media!
Enjoyed this recipe? Share it with friends and family, and don't forget to leave a review!
This recipe looks amazing! Can't wait to try it.
Comments are stored locally in your browser. Server comments are displayed alongside your local comments.

Join to receive our email series which contains a round-up of some of our quick and easy family favorite recipes.
