
>>

A no-bake, layered peanut butter dessert that combines a crisp cookie base, tangy cream cheese layer, silky peanut butter pudding, and a cloud of whipped topping for an irresistible crowd-pleaser.
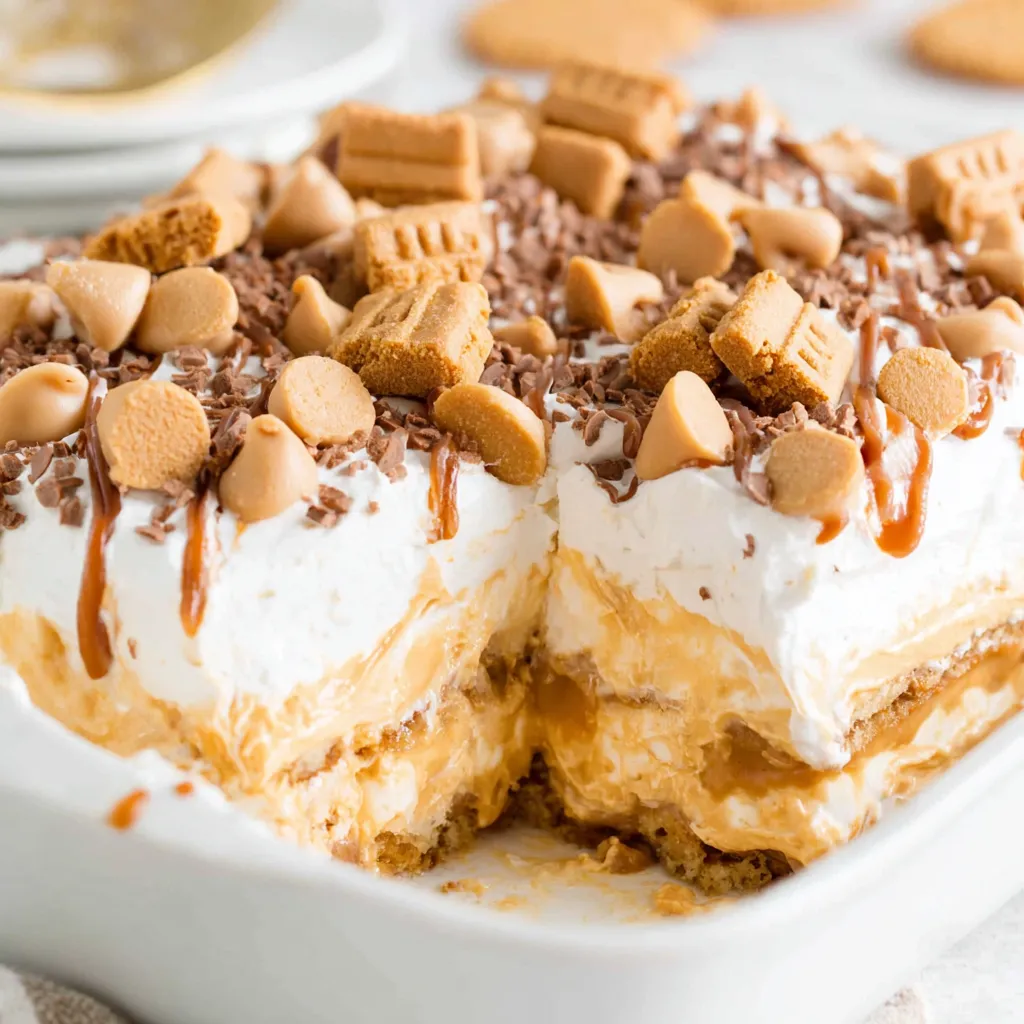
This peanut butter lasagna is the kind of sweet that became a staple in my house as soon as I tasted it. I first made it for a summer potluck when I wanted something that could travel well, stand up to a warm day, and please a room full of peanut butter lovers. The layered construction gives every bite multiple textures: a crisp cookie base that snaps, a tangy cream cheese layer that balances sweetness, a smooth peanut butter pudding layer that tastes like a grown-up candy, and a light cloud of whipped topping studded with chips and cookie crumbs. It turned into our neighborhood favorite almost instantly.
I discovered the combination when I was experimenting with pantry staples and a box of instant vanilla pudding that needed using. What makes this recipe special is how forgiving it is. There is no oven required, and it keeps beautifully in the fridge for easy serving. I often assemble it the night before parties so the layers have time to settle and the flavors blend. My family always asks for the edges, which are the crispiest and the most prized; I learned to reserve a few cookies from the original package so I could crumble them on top for a dramatic finish.
In my experience this dish always brings people together. At holiday gatherings it disappears the quickest. I once brought it to a family reunion and watched three generations pass the pan back and forth until the last spoonful was claimed. It’s one of those desserts that sparks nostalgia and gets people talking about their favorite peanut butter treats.
My favorite part is the ritual of sprinkling the final crumbs and chips over the top while the crowd gathers. People always ask what is in it, and when I tell them it is mostly pantry ingredients they are surprised. I have adapted it for birthdays and summer barbecues and each time I make the small adjustments—extra chips here, a chocolate drizzle there—people remark that it tastes familiar but new, a balance I aim for when serving family and friends.
Store the dish covered with plastic wrap or a tight-fitting lid in the refrigerator for up to three days. If you need to keep it longer, cut into individual portions and freeze them in an airtight container for up to three months. When freezing, place baking parchment between layers to prevent sticking. To serve from frozen, transfer to the refrigerator overnight to thaw slowly, or thaw on the counter for 30 to 60 minutes before serving. Freshness indicators are the whipped topping losing volume and cookies becoming uniformly soft; both are still edible but the texture will be different.
If you want a dairy-free version, substitute full-fat coconut cream whipped and use a dairy-free cream cheese alternative and a dairy-free instant pudding mix. For a gluten-free option, use certified gluten-free peanut butter sandwich cookies or make a graham-style crust from gluten-free crumbs. Swap creamy peanut butter for natural peanut butter for a nuttier flavor but note that natural styles can separate and may require warming to blend smoothly. For reduced sugar, use a sugar-free instant pudding and a powdered sugar substitute designed for baking, but expect a slight change in texture and sweetness profile.
Serve slices chilled with a scoop of vanilla ice cream or a drizzle of warm chocolate sauce for extra decadence. For parties, place small dessert forks and napkins nearby because the layers are indulgent and invite savoring. Garnish each slice with a few extra chips or a dusting of finely crushed cookies for a professional presentation. This dessert pairs well with a strong coffee or a light dessert wine for adult gatherings.
Layered chilled desserts like this have roots in American potluck culture where convenience and portability are prized. Elements such as sandwich cookies and instant pudding became popular in 20th-century pantries and are now staples in quick-assembly layered sweets. This type of no-bake layered treat evolved as cooks combined shelf-stable items with dairy to create showy desserts without the need for long oven time, fitting modern lifestyles and busy entertaining schedules.
In summer, keep it classic and chill thoroughly so it travels well. For fall or winter, stir a pinch of cinnamon into the cream cheese layer, add chopped roasted peanuts for extra warmth, or swap vanilla pudding for chocolate to create a richer profile. For holidays, press festive cookie crumbs on top or alternate cookie varieties for contrasting colors. Each season invites small tweaks that highlight seasonal flavors without changing the core technique.
Assemble the base layers the evening before and add the final whipped topping, chips, and drizzle just before serving to keep the toppings visually fresh. Portion into individual serving containers for grab-and-go treats during the week. Use airtight containers and include a small vented lid or parchment to prevent condensation if transporting. Time-saving trick: microwave the peanut butter for 20 to 30 seconds to make it drizzle-ready and avoid clumping when finishing the top.
In closing, this peanut butter layered dessert is a dependable crowd-pleaser that balances nostalgia with simplicity. It rewards small attentions to texture and chilling time and offers plenty of room for personalization. Share it with friends, reserve the edges for the biggest fans, and enjoy the happy sighs that follow the first bite.
Soften cream cheese to room temperature before mixing to avoid lumps and ensure a smooth layer.
Chill the layers briefly in the freezer between steps to get clean, distinct layers when spreading.
Reserve several whole cookies to crush and sprinkle on top for a fresh-texture finish.
Warm peanut butter for 20 to 30 seconds to make it easier to drizzle without clumping.
Use a stable whipped topping if the dish needs to hold for several hours at a party.
This nourishing peanut butter lasagna recipe is sure to be a staple in your kitchen. Enjoy every moist, high protein slice — it is perfect for breakfast or as a wholesome snack any time.
Yes. Cover tightly and refrigerate for up to three days; to keep longer, slice and freeze individual portions for up to three months.
Use a stable whipped topping or freshly whipped heavy cream. If using natural peanut butter, warm slightly to combine smoothly.
This Peanut Butter Lasagna recipe makes perfectly juicy, tender, and flavorful steak every time! Serve with potatoes and a side salad for an unforgettable dinner in under 30 minutes.
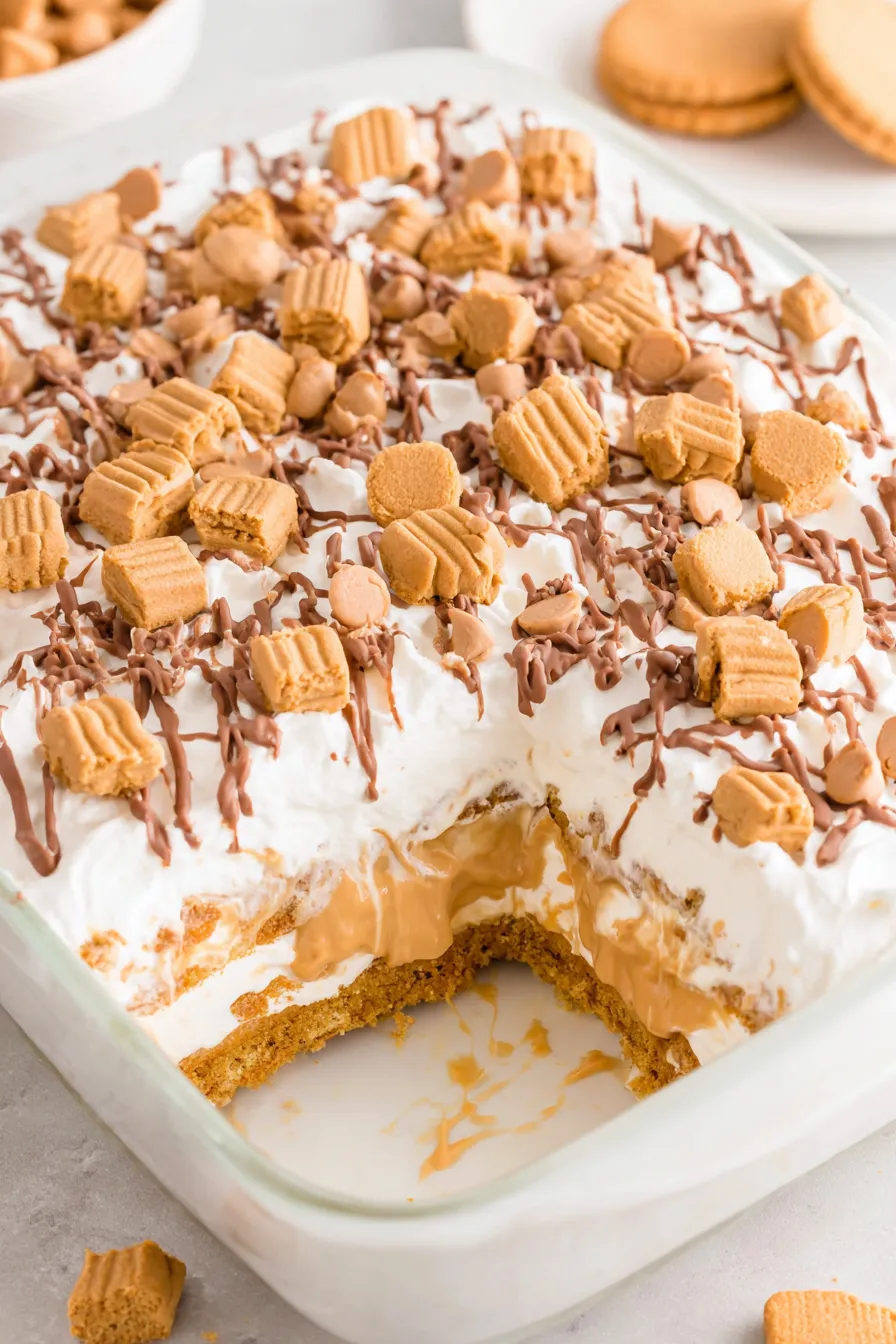
Grease a 9 x 13 glass baking dish lightly. Arrange a single layer of peanut butter sandwich cookies to cover the bottom, about 22 cookies. Reserve 8 cookies for the topping.
Beat 8 ounces room-temperature cream cheese until smooth. Add 1 cup powdered sugar and beat until combined. Fold in 1 cup whipped topping and spread evenly over cookie base. Freeze 15 minutes to firm.
Whisk instant vanilla pudding mix into 1 1/2 cups cold whole milk until beginning to thicken. Stir in 1 cup creamy peanut butter until smooth. Fold in 1 cup whipped topping and spread over chilled cream cheese layer. Freeze 15 minutes.
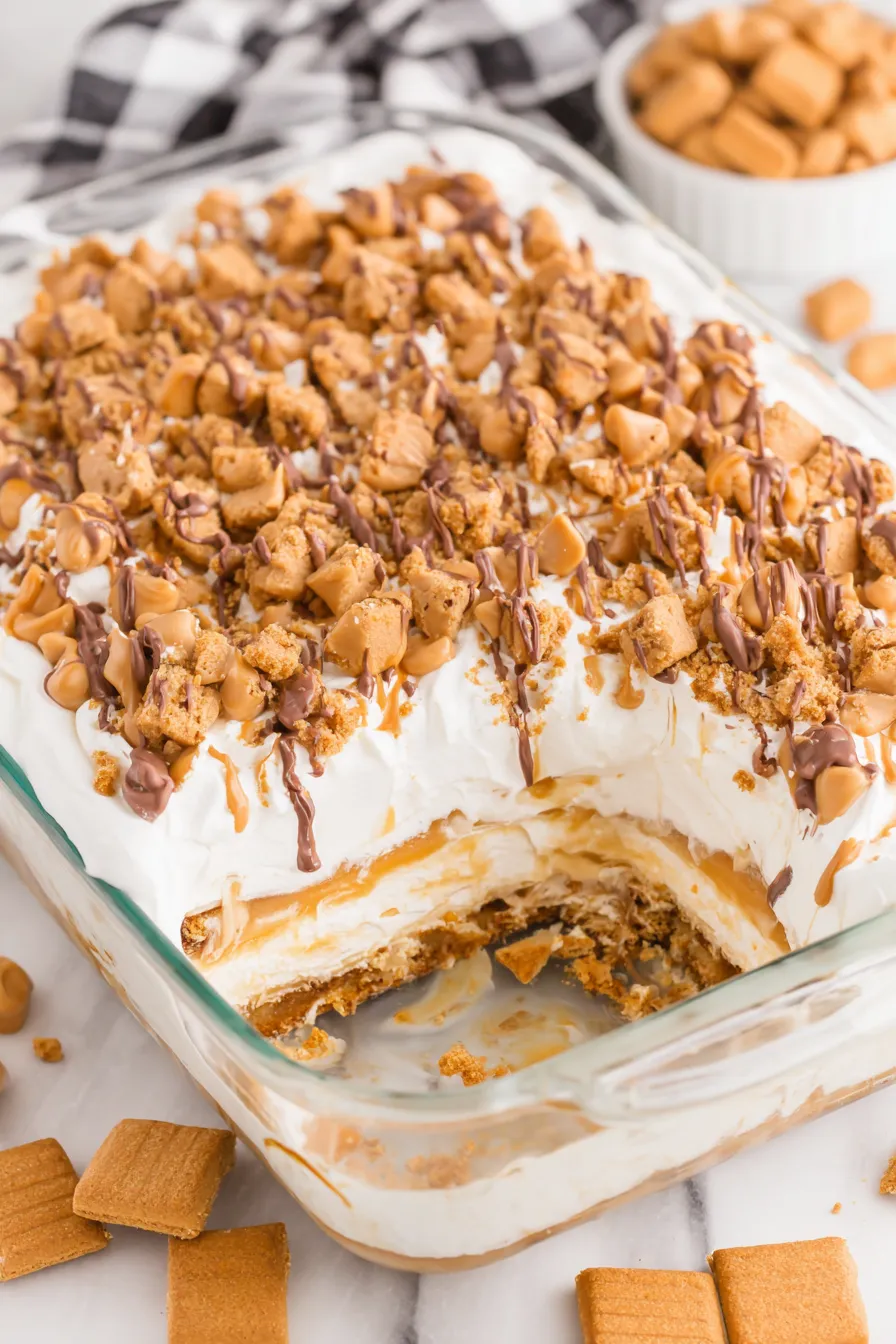
Spread remaining 2 cups whipped topping over the peanut butter layer. Sprinkle 1/2 cup peanut butter chips and chopped reserved cookies. Melt 1/2 cup peanut butter and drizzle over the top. Chill in refrigerator 30 minutes or freezer 15 minutes before serving.
Last Step: Please leave a rating and comment letting us know how you liked this recipe! This helps our business to thrive and continue providing free, high-quality recipes for you.
Leave a comment & rating below or tag
@forkelle on social media!

Thick, fudgy chocolate chunk brownies crowned with gooey mini marshmallows and a quick-set chocolate frosting for an irresistible, crowd-pleasing treat.

Buttery shortbread meets a gooey, brown-sugar pecan topping in these quick pecan pie bars. Just 10 minutes to prep and perfect for sharing.

Silky, crack-free pumpkin cheesecake with warm spice, buttery graham crust, and optional caramel and rum-kissed whipped cream. Your effortless holiday showstopper.
Leave a comment & rating below or tag @forkelle on social media!
Enjoyed this recipe? Share it with friends and family, and don't forget to leave a review!
This recipe looks amazing! Can't wait to try it.
Comments are stored locally in your browser. Server comments are displayed alongside your local comments.

Join to receive our email series which contains a round-up of some of our quick and easy family favorite recipes.
