
>>

Crisp golden pastry pockets filled with warmly spiced apple filling and a crunchy cinnamon sugar topping. Perfect for snack time, dessert, or on the go.
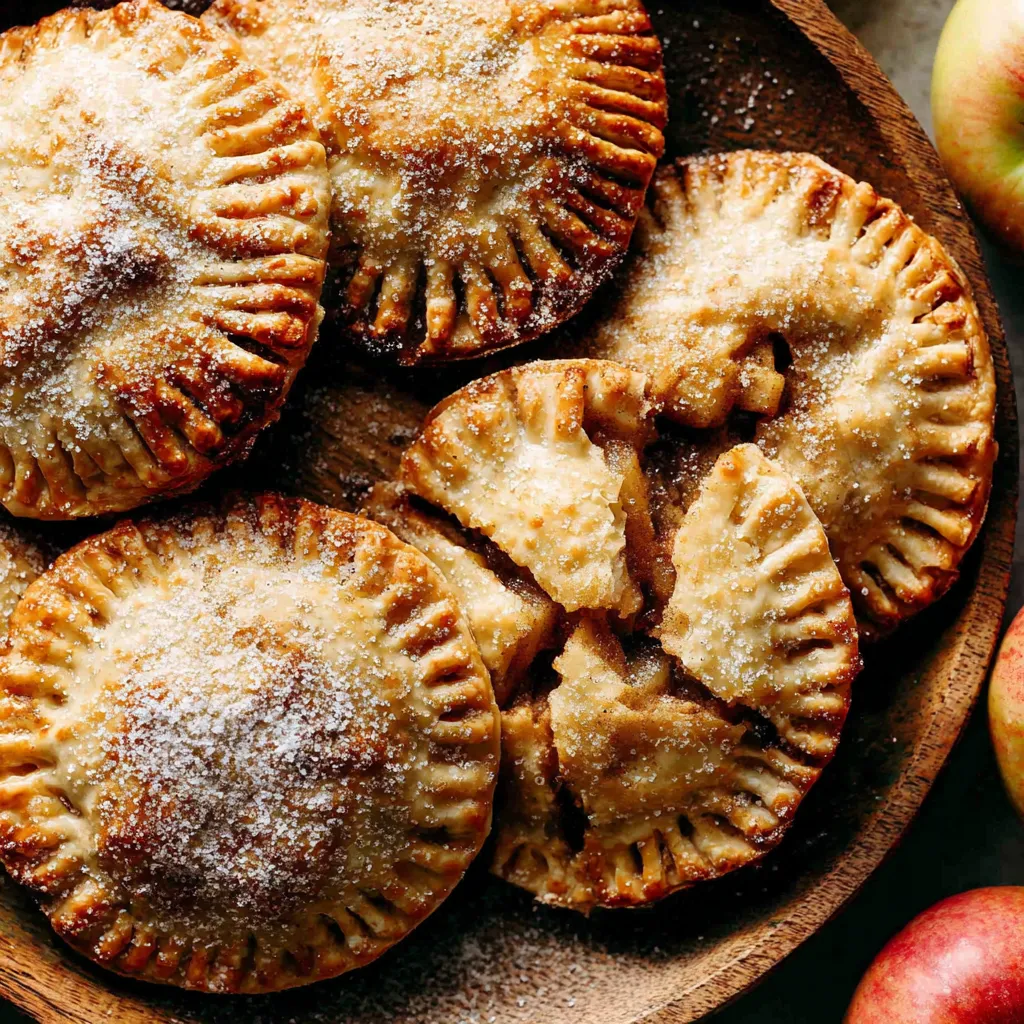
This recipe for mini apple hand pies is the kind of recipe I reach for when I want something nostalgic and hand held. I first made these on a rainy Saturday when I had two sheets of store bought pie dough and a couple of apples that were begging to be used. The result was a batch of golden, apple shaped pockets with tender apple pieces that still had a little bite and a glossy, sugary top that cracked delightfully when you bit into it. They are crisp on the outside and soft and saucy inside which makes for a perfect contrast every time.
I love these for how forgiving they are. The filling is straightforward and cooks down in one pan while the dough rests at room temperature. My kids call them little apples and they are a hit at school parties and brunches. Use Fuji or Honeycrisp for a sweet and slightly tart filling that holds texture. I often double the filling and freeze half for a quick second bake on busy days. They are simple enough for a beginner but satisfying enough to share with guests, which is why they are now a regular in my rotation.
I remember bringing these to a neighborhood brunch and watching people come back for seconds. My sister said they reminded her of the little apple pastries from a bakery she loved as a child. That moment made me appreciate how small bites can carry big memories and how the simple combination of sugar and warm fruit can bring everyone together at the table.
One of my favorite things about these little pies is the aroma that fills the kitchen while they bake. The combination of cinnamon and warm apple is comforting and familiar. When I make a double batch I always send extras home with neighbors and have learned that the easiest way to share is to package them in parchment lined boxes. They are a perfect way to say thank you or to bring a bit of cozy to someone who needs it.
Store cooled pies in an airtight container at room temperature for up to two days. For longer storage place them in the refrigerator for up to five days. To freeze, flash freeze the assembled unbaked pies on a sheet tray until firm then transfer to a freezer safe bag or container for up to three months. To bake from frozen place them on a lined sheet and add a few minutes to the baking time until golden and heated through. Reheat baked pies in a two hundred eighty five degree Fahrenheit oven for ten minutes to refresh crispness.
For dairy free use a plant based stick butter or margarine and follow the same technique. Swap apples for pears for a milder flavor but cook times may vary as pears soften faster. If you need the recipe to be gluten free use labeled gluten free pie dough and handle it slightly warmer since it can be more fragile. Replace brown sugar with coconut sugar for a deeper flavor and slightly less sweetness. You can omit the egg wash and brush with a little milk or nondairy milk for sheen but egg wash gives the best golden color.
Serve warm with a scoop of vanilla ice cream for dessert or on their own as a mid afternoon treat. For brunch pair with coffee and a citrus salad to cut through the sweetness. Garnish with a light dusting of powdered sugar or a drizzle of caramel sauce for a festive presentation. They also travel well so pack a few in a picnic basket with a linen napkin and salty nuts for contrast.
Hand held fruit pastries are a classic comfort food across many cuisines. These mini pockets borrow from American pie traditions where seasonal fruit is enclosed in pastry. Small portable pastries have been popular for centuries because they travel easily and reduce the need for plates. In the United States apple desserts hold a special place in fall and holiday baking, and turning the apple into an individual size is a nod to both convenience and tradition.
In autumn boost the spice by adding a quarter teaspoon nutmeg and a pinch of ground cloves. In summer use fresh stone fruit or berries but reduce or omit the cornstarch if the fruit is very juicy. For holiday parties fold in a tablespoon of chopped toasted pecans into the filling for crunch. You can also brush the finished pies with warmed apricot jam for a glossy fruit finish in colder months.
Make the filling two days ahead and keep chilled. Cut shapes and store them flat separated by parchment paper in the refrigerator for up to two days. Assemble right before baking or freeze unbaked on a tray then bag for a quick bake straight from the freezer. Use a small cookie scoop to portion filling consistently so all pies bake evenly. Label frozen batches with the date to keep track of freshness.
These mini apple hand pies are small in size but big in comfort. They are forgiving, portable, and endlessly adaptable so I encourage you to make them your own and share them with someone you love.
Keep the dough cold until ready to cut to avoid tearing and to get flakier layers when baking.
Use a small cookie scoop to portion filling so each pocket bakes evenly and you do not overfill the edges.
Make the filling ahead and refrigerate it to speed up assembly when you are short on time.
Chill assembled unbaked pies on a tray before baking to help maintain shape and prevent spread.
This nourishing mini apple hand pies recipe is sure to be a staple in your kitchen. Enjoy every moist, high protein slice — it is perfect for breakfast or as a wholesome snack any time.
Yes. You can assemble them and freeze unbaked on a tray then transfer to a bag for up to three months. Bake from frozen adding a few minutes to the baking time.
Use plant based butter and a labeled gluten free pie dough. Omit the egg wash or use nondairy milk for sheen.
Store in an airtight container at room temperature for two days or refrigerate for up to five days. Reheat in a low oven to refresh crispness.
This Mini Apple Hand Pies recipe makes perfectly juicy, tender, and flavorful steak every time! Serve with potatoes and a side salad for an unforgettable dinner in under 30 minutes.
Remove pie dough from the refrigerator and let sheets sit covered at room temperature for 15 to 20 minutes to become pliable. This prevents tearing when you roll and cut shapes.
Melt two tablespoons butter in a saucepan over medium heat. Add two and a half cups chopped apples, one quarter cup packed light brown sugar, one teaspoon cinnamon, and juice of half a lemon. Cook about ten minutes until apples are tender and juices are released.
Stir together one half teaspoon cornstarch with one tablespoon water and add to the apples. Cook for thirty seconds until glossy and slightly thickened. Remove from heat and cool before assembling.
Preheat oven to 400 degrees Fahrenheit and line a baking sheet with parchment paper. This ensures an even golden finish and easy cleanup.
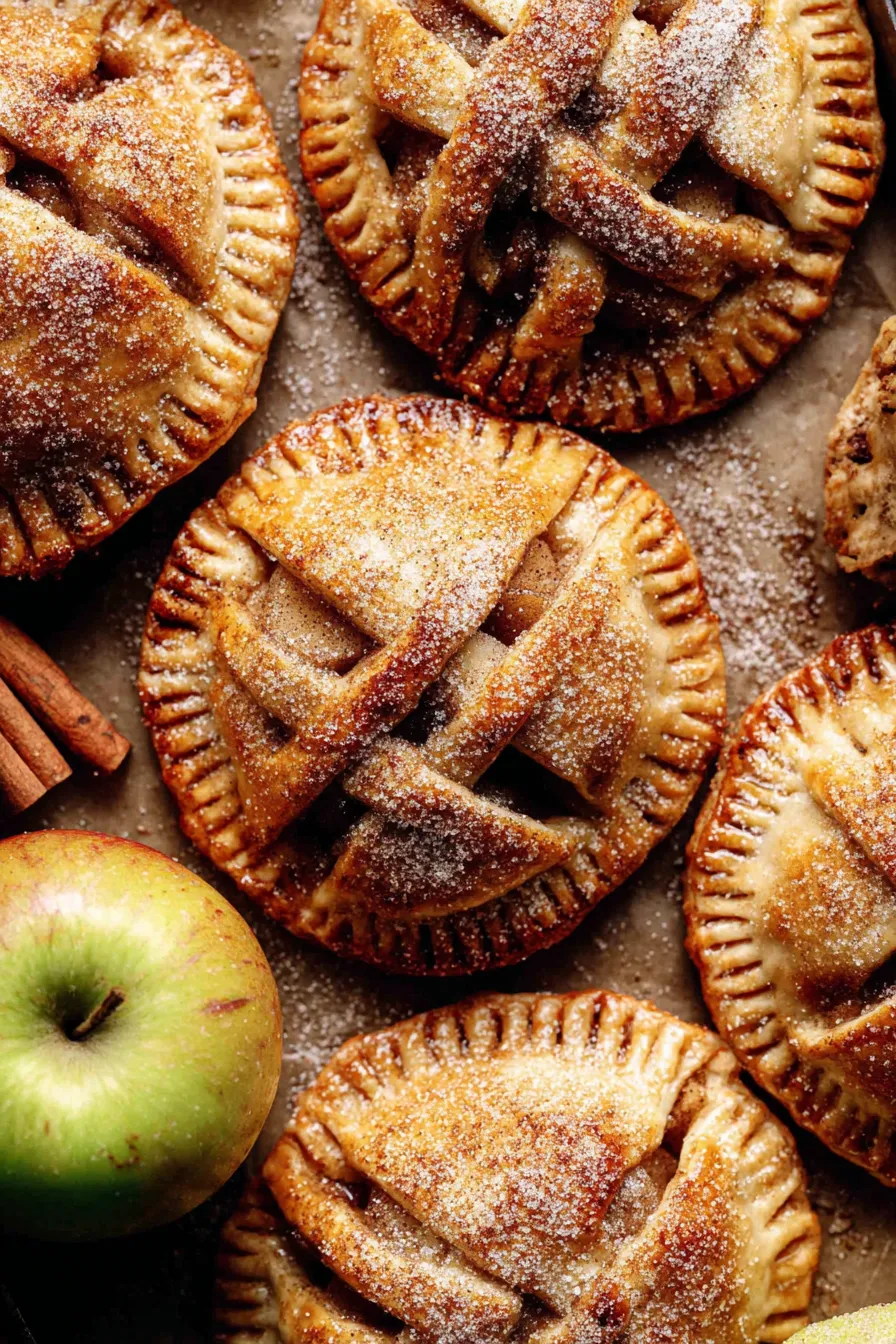
Lightly flour a work surface and unroll the first pie sheet. Smooth with a rolling pin and cut apple shapes using a cookie cutter or template. Chill the cut shapes while you cut the second sheet.
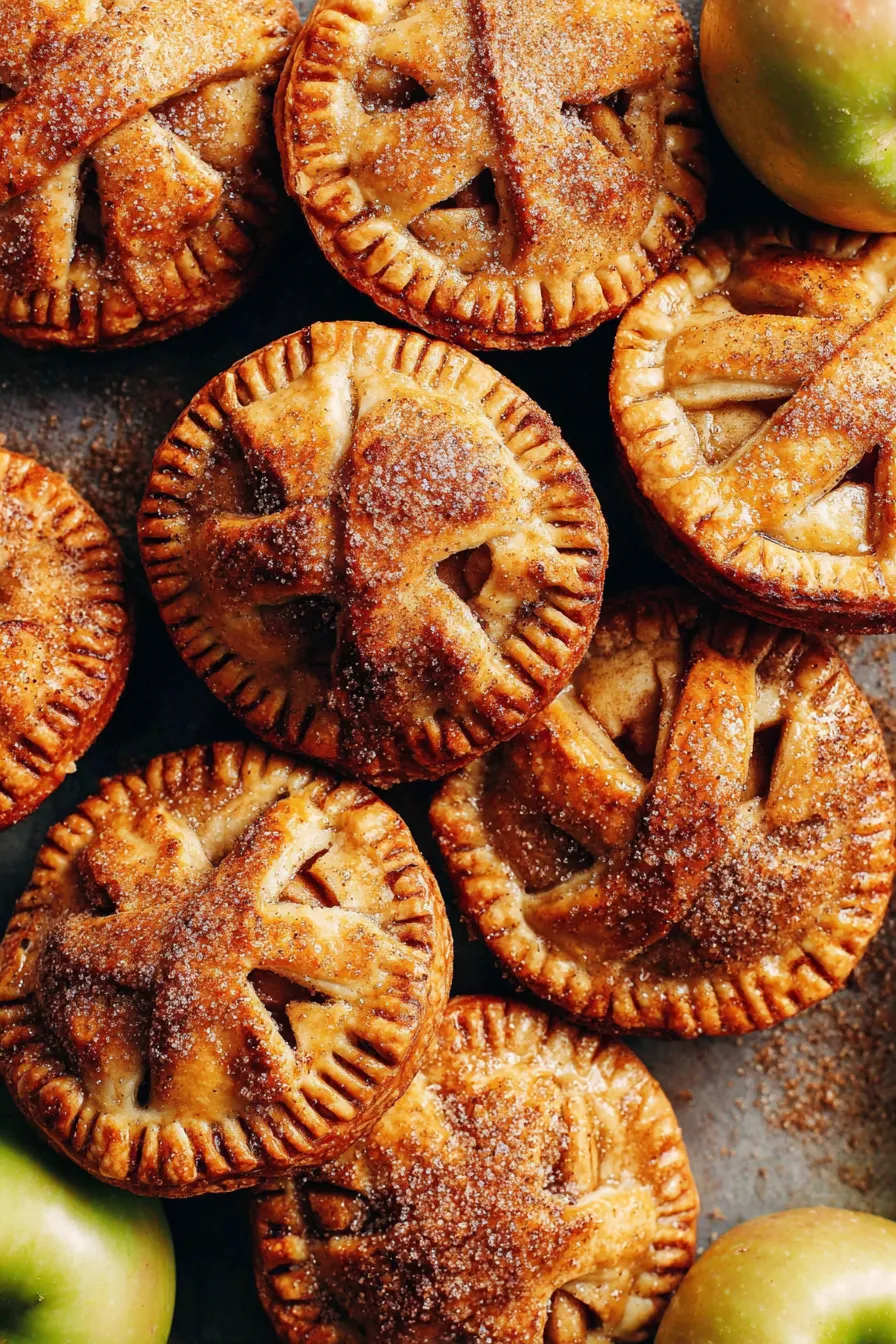
Place half of the apple shapes on the baking sheet. Spoon one tablespoon filling into each, brush borders with egg wash, cover with vented apple tops, press edges and crimp with a fork. Brush the tops with egg wash and sprinkle cinnamon sugar.
Bake for 12 to 14 minutes until golden brown and slightly caramelized. Cool on the sheet for five minutes then transfer to a rack to finish cooling so bottoms stay crisp.
Last Step: Please leave a rating and comment letting us know how you liked this recipe! This helps our business to thrive and continue providing free, high-quality recipes for you.
Leave a comment & rating below or tag
@forkelle on social media!

Thick, fudgy chocolate chunk brownies crowned with gooey mini marshmallows and a quick-set chocolate frosting for an irresistible, crowd-pleasing treat.

Buttery shortbread meets a gooey, brown-sugar pecan topping in these quick pecan pie bars. Just 10 minutes to prep and perfect for sharing.

Silky, crack-free pumpkin cheesecake with warm spice, buttery graham crust, and optional caramel and rum-kissed whipped cream. Your effortless holiday showstopper.
Leave a comment & rating below or tag @forkelle on social media!
Enjoyed this recipe? Share it with friends and family, and don't forget to leave a review!
This recipe looks amazing! Can't wait to try it.
Comments are stored locally in your browser. Server comments are displayed alongside your local comments.

Join to receive our email series which contains a round-up of some of our quick and easy family favorite recipes.
