
>>

Classic homemade hard candy — glossy, brightly flavored pieces made from sugar and corn syrup. Crisp, old-fashioned treats you can flavor and color any way you like.
My first time sharing these at a holiday party, people kept asking what candy shop I’d bought them from. I’ve since made batches for birthdays, neighborhood swaps, and quiet afternoons when I wanted a small, bright sweet. The process taught me to respect temperature and timing: a few degrees on the thermometer is the difference between chewy taffy and crisp candy.
I love the simple joy of cutting a long, jewel-like strip and watching guests’ faces light up when they taste the first piece. The best batches are the ones made slowly and mindfully: I always set a timer and give myself space to focus on temperature, not multitasking. Over the years I’ve learned to keep a small bowl of cool water nearby for immediate first aid if anyone drips sugar on their skin (immerse in cool water; do not try to peel it off hot sugar).
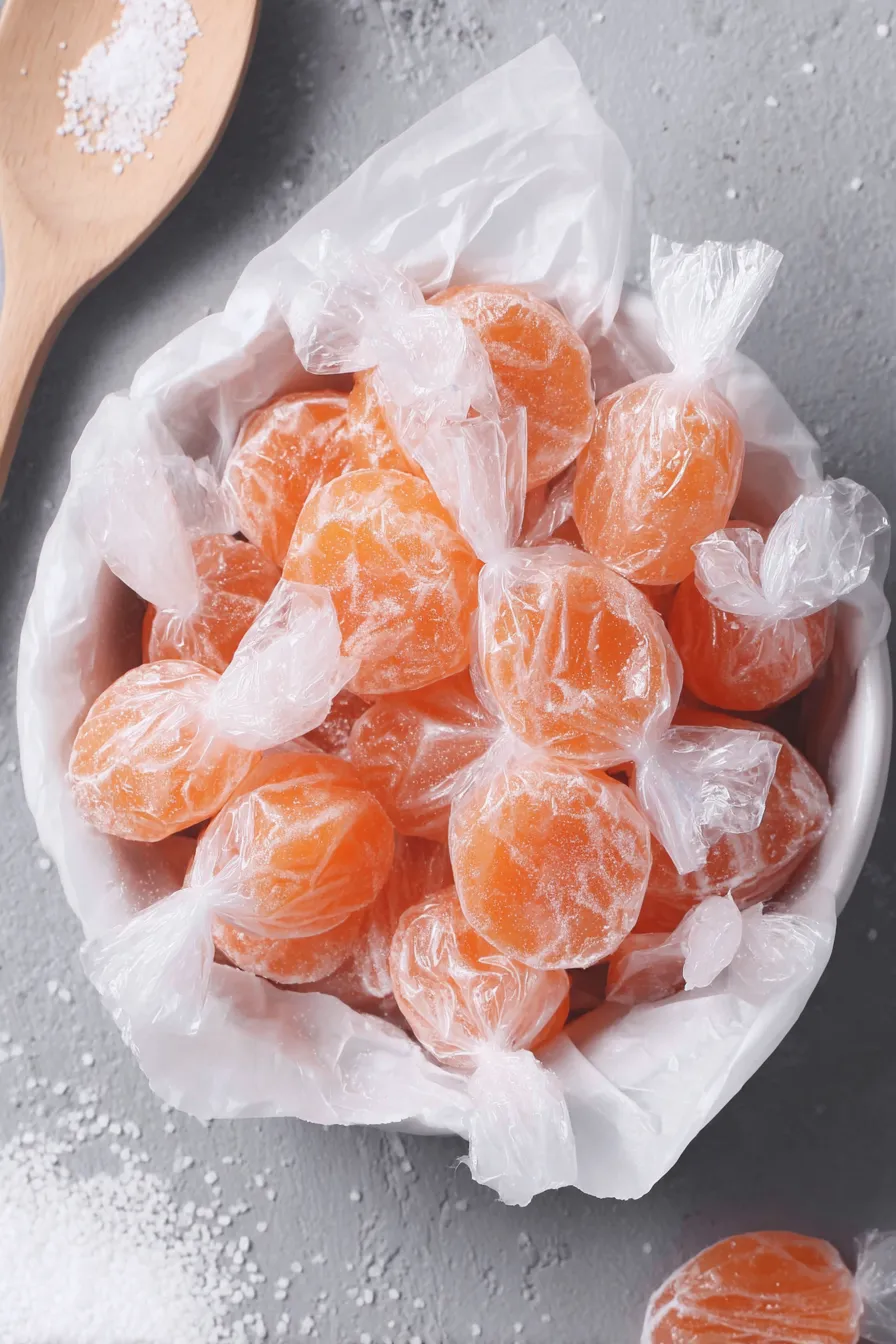
Store finished pieces in a dry, airtight container at room temperature; they keep best away from humidity and heat. Layer the candy between sheets of parchment or wax paper to prevent sticking and preserve the glossy finish. If your kitchen is particularly humid, add a small packet of silica gel (food-safe, not directly touching candy) or keep the container in the coolest part of the house. Properly stored, these will stay crisp for 3–4 weeks; refrigeration is not recommended because moisture will soften the texture. For long-term storage or gifting, wrap individual pieces in waxed paper and place them in a tin.
If you don’t have light corn syrup, glucose syrup can be used in the same ratio, though it may slightly alter clarity and mouthfeel. Avoid using honey or maple syrup as direct substitutes; they bring flavor and water content differences that affect setting. For flavor swaps, peppermint extract is a great winter alternative — use 1 teaspoon for a strong mint profile. If you prefer natural color, squeeze in small amounts of beet juice (for red) or carrot juice (for orange), though these may add trace moisture and change cooking time; reduce water by 1 teaspoon if using fresh juices. For a vegan-concerned audience, verify that confectioners’ sugar is bone-char-free (many brands are labeled vegan).
Arrange pieces in small glass bowls as a colorful after-dinner palate cleanser, or bag them in clear cellophane and tie with ribbons for homemade favors. For holiday presentations, press small edible glitter or sanding sugar gently on the dusted surface before it fully sets for sparkle. Pair citrus-flavored pieces with herbal teas, and anise with black coffee or espresso. These also make excellent cocktail garnishes — a small orange candy perched on the rim of an Old Fashioned adds a nostalgic touch.
Hard candy has long been a staple in many cultures; clear, boiled sugar confections became popular in Europe and America in the 19th century when sugar became more affordable. Regional variations include spice-scented lozenges in Scandinavia and anise drops in Mediterranean countries. In the United States, light-colored, flavored hard candies evoke old-fashioned confection shops and holiday traditions. This simple syrup-based method mirrors classic candy-making techniques where temperature and crystallization control determine final texture.
In winter, swap orange extract for peppermint and dust with crushed candy canes for festive crunch. Spring and summer benefit from bright citrus — lemon or lime — and floral additions like a drop of rose water paired with pale pink coloring. For Halloween, use deep orange and black-colored pieces; for autumn gatherings add a touch of ground cinnamon (use sparingly to avoid graininess) combined with orange extract for a warm, seasonal flavor profile.
Make several batches and store in airtight tins for quick treats throughout the month. Cool the filled pan completely before covering to avoid trapping steam. When preparing multiple colors, cook one color at a time and allow the pan and utensils to cool between batches to prevent premature hardening. Label each container with the flavor and date to rotate stock and avoid confusion when gifting.
Making these candies is a gentle lesson in patience and heat control — the reward is bright, vibrant pieces that taste like handmade nostalgia. Give yourself time, respect the thermometer, and enjoy the smiles that follow the first crisp bite.
Always use a heavy-bottomed saucepan and a clip-on candy thermometer for stable temperature readings.
Cover the boiling sugar briefly at the start of boiling to dissolve stray crystals before continuing uncovered.
Work quickly once the syrup reaches temperature: pour into the sugar bed without delay to maintain clarity and shape.
Keep a small bowl of cool water nearby for quick first aid — do not try to peel hot sugar from skin; immerse in cool water immediately.
If using gel coloring, add only a tiny amount to avoid thickening the syrup and slowing your pour.
This nourishing homemade hard candy recipe is sure to be a staple in your kitchen. Enjoy every moist, high protein slice — it is perfect for breakfast or as a wholesome snack any time.
If your candy becomes sticky after cooling, it likely absorbed moisture from the air; store in an airtight container with a desiccant or recoat lightly in confectioners' sugar.
Use a reliable candy thermometer and ensure it reads 300°F for the hard-crack stage. Small differences in temperature cause big textural changes.
This Homemade Hard Candy recipe makes perfectly juicy, tender, and flavorful steak every time! Serve with potatoes and a side salad for an unforgettable dinner in under 30 minutes.
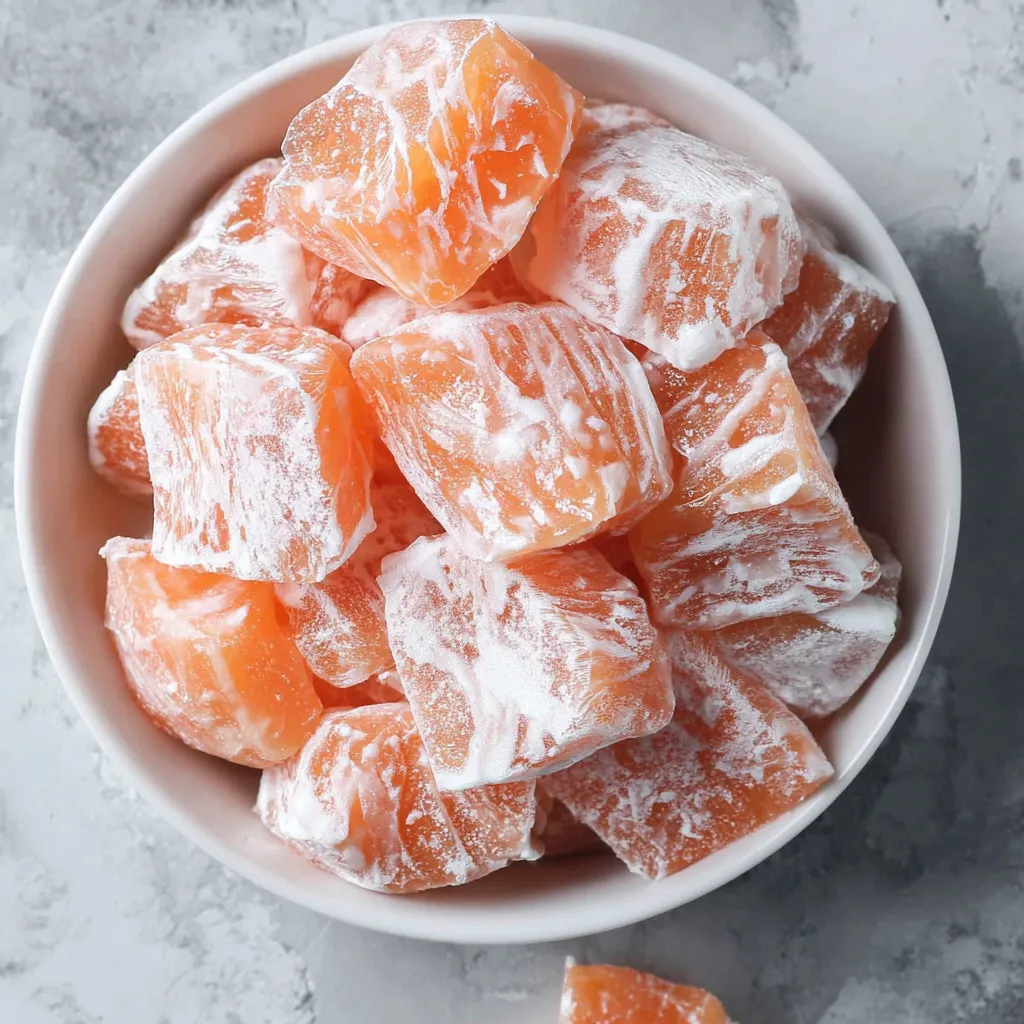
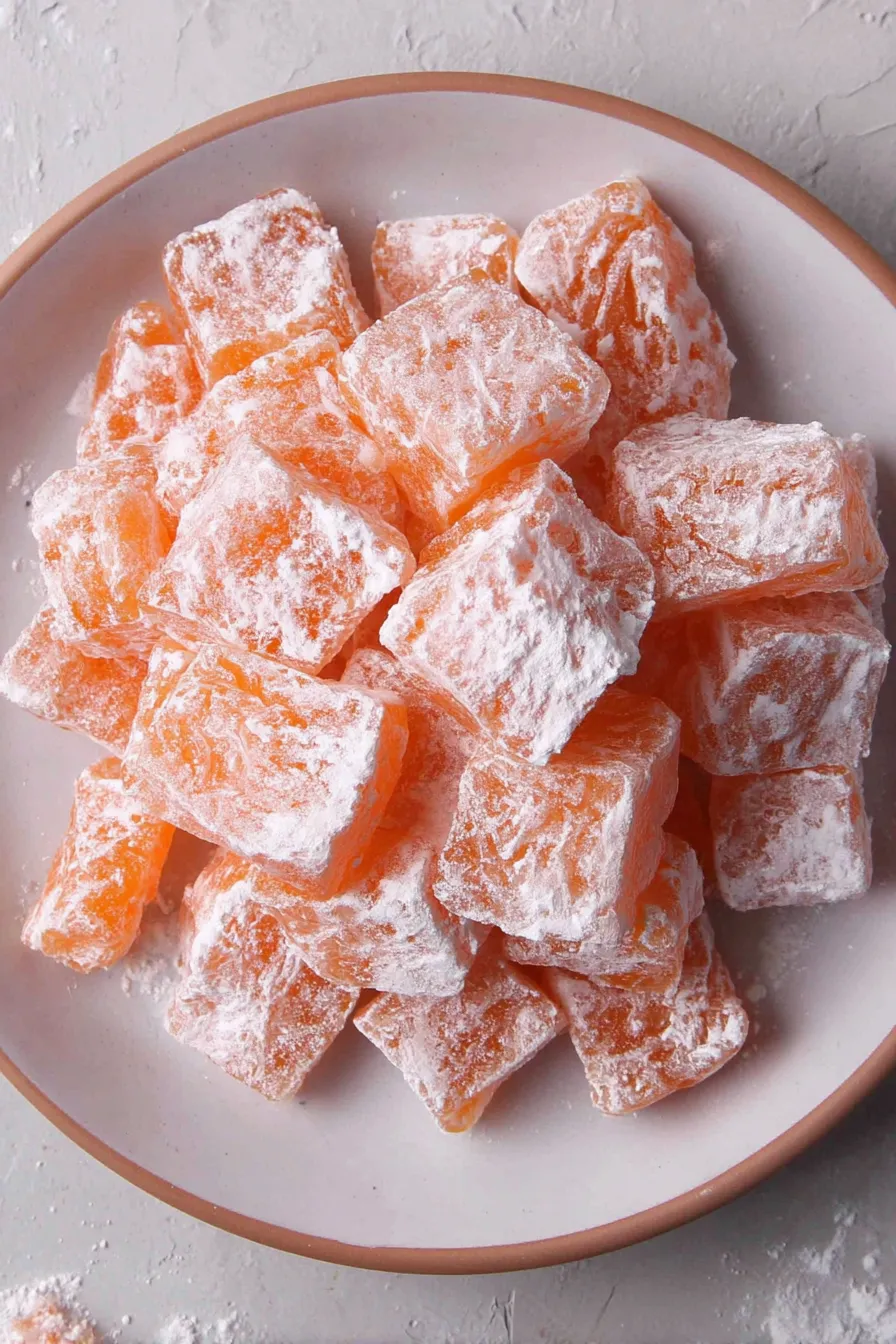
Spread 5–6 cups of confectioners' sugar in a 15 x 10 x 1-inch rimmed pan to a depth of about 1/2 inch, and use a wooden spoon handle to carve a continuous groove for pouring. Set aside.
In a large heavy saucepan combine 2 cups granulated sugar, 3/4 cup light corn syrup, and 1/2 cup water. Warm over medium heat and stir until the sugar begins to dissolve.
Bring the mixture to a boil, cover the pan and let it steam for 3 minutes to dissolve stray crystals, then remove the lid and continue.
Increase heat to medium-high and cook without stirring until a candy thermometer reads 300°F. Watch closely to avoid overheating.
Remove from heat, wait briefly for violent bubbling to subside, then stir in 1–2 teaspoons extract and a few drops of food coloring if desired.
Transfer hot syrup to a heatproof measuring cup and carefully pour into the prepared groove in the confectioners' sugar. Immediately dust with more confectioners' sugar to prevent sticking.
Allow candy to cool completely until firm, then cut into pieces with scissors and store in an airtight container at room temperature.
Last Step: Please leave a rating and comment letting us know how you liked this recipe! This helps our business to thrive and continue providing free, high-quality recipes for you.
Leave a comment & rating below or tag
@forkelle on social media!

Thick, fudgy chocolate chunk brownies crowned with gooey mini marshmallows and a quick-set chocolate frosting for an irresistible, crowd-pleasing treat.

Buttery shortbread meets a gooey, brown-sugar pecan topping in these quick pecan pie bars. Just 10 minutes to prep and perfect for sharing.

Silky, crack-free pumpkin cheesecake with warm spice, buttery graham crust, and optional caramel and rum-kissed whipped cream. Your effortless holiday showstopper.
Leave a comment & rating below or tag @forkelle on social media!
Enjoyed this recipe? Share it with friends and family, and don't forget to leave a review!
This recipe looks amazing! Can't wait to try it.
Comments are stored locally in your browser. Server comments are displayed alongside your local comments.

Join to receive our email series which contains a round-up of some of our quick and easy family favorite recipes.
