
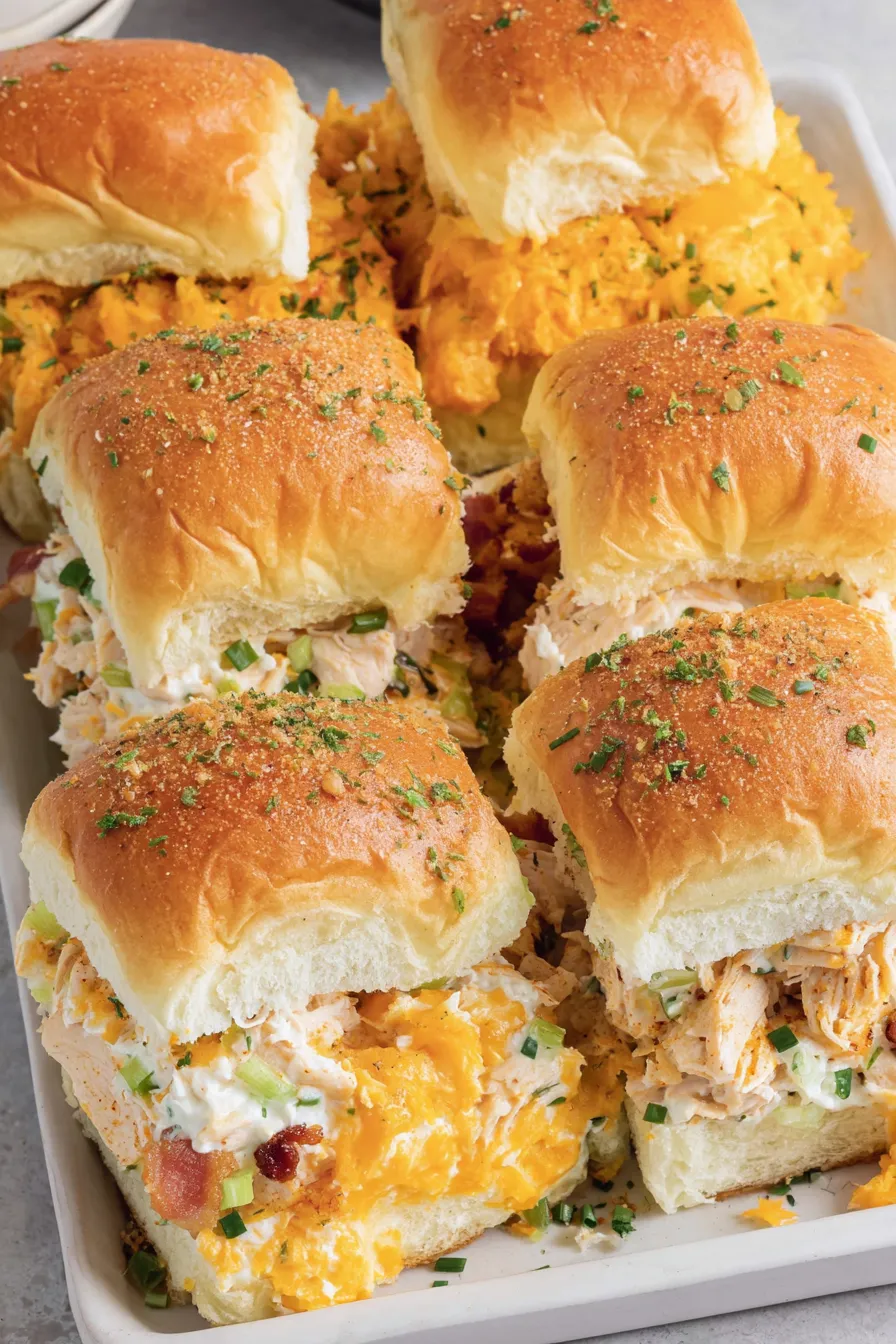
Crack Chicken Sandwiches

A gooey, savory pull-apart sandwich loaded with tender shredded chicken, crisp bacon, and three cheeses on sweet Hawaiian rolls — perfect for game day or a crowd.

This version of crack chicken sandwiches has been a crowd magnet at my house for years. I first made it on a busy weekend when friends dropped by unexpectedly and all I had were pantry staples and leftover roast chicken. The combination of softened cream cheese, ranch seasoning, shredded chicken and bacon felt indulgent but approachable, and the sweet Hawaiian rolls give each bite a perfect counterpoint to the salty, cheesy filling. It’s one of those small miracles where minimal effort yields a plate of sliders that disappear before you can warm your hands on the baking dish.
What makes these sliders special is the balance between textures and flavors: silky, tangy cream cheese melds with shredded cheddar and crunchy bacon, while the rolls toast and soak up savory juices without turning soggy. The green onions and chives add lifts of freshness so every mouthful still tastes bright. I usually prepare the filling earlier in the day and assemble just before a party, which keeps the rolls from becoming too soft and saves time when guests arrive. They’re a weekend staple when I want something comforting, shareable, and undeniably tasty.
Why You'll Love This Recipe
- Ready in about 45 minutes from start to finish — 15 minutes active prep and roughly 30 minutes in the oven — so it’s perfect for last-minute entertaining.
- Uses pantry-friendly ingredients and common deli items: cream cheese, ranch mix, cooked chicken and pre-cooked bacon make assembly quick and reliable.
- Make-ahead friendly: you can prepare the filling up to 24 hours before baking, which makes hosting easier and reduces day-of stress.
- Crowd-pleaser: gooey cheese, smoky bacon and slightly sweet rolls appeal to both kids and adults, great for game day, potlucks or casual dinners.
- Flexible and forgiving: swap cheeses, use rotisserie chicken, or turn it into a low-carb platter with lettuce wraps and it still shines.
I remember bringing a pan of these to a neighborhood block party and people asked for seconds — and the recipe. My sister even copied the filling into her own breakfast casserole the next morning, because the flavors kept calling back for more. Simple, reliable, and always a hit.
Ingredients
- Cream cheese (16 ounces): Use full-fat, block-style cream cheese at room temperature so it melts smoothly; Philadelphia brand is what I reach for when I want consistent texture.
- Dry ranch dressing mix (1 ounce packet): Adds tang and herb notes — substitute with 3 tablespoons homemade ranch seasoning if preferred.
- Onion powder (2 teaspoons) and cracked black pepper (1 teaspoon): These build background savory flavor; fresh-cracked pepper gives a sharper finish.
- Green onion (1/3 cup thinly sliced): Use the tender green and white parts for freshness and a little crunch.
- Cooked shredded chicken (2 1/2 cups): Rotisserie chicken works beautifully — aim for bite-sized shreds so the filling layers evenly.
- Cooked crumbled bacon (12 ounces): Thick-cut, cooked until crisp and roughly chopped — it holds texture after mixing.
- Mild shredded cheddar (2 1/2 cups, divided): Reserve 1 cup for the filling and 1 1/2 cups for topping; pre-shredded works, but freshly shredded melts better.
- Sweet Hawaiian rolls (12 count): King’s Hawaiian or similar — slice in half horizontally so you can spread the filling across the bottom halves.
- Salted sweet cream butter (6 tablespoons), melted: Brush on tops to promote browning and a rich finish.
- Grated Parmesan (2 tablespoons) and fresh chives (2 teaspoons): Sprinkled over butter for a salty, herbal finishing touch.
Instructions
Preheat and prepare dish: Preheat the oven to 350°F. Lightly spray a 9x13-inch baking dish with nonstick spray and set it aside so everything is ready when the filling is mixed. Melt the cream cheese: Place the softened cream cheese into a 4- to 5-quart heavy-bottomed stockpot over medium heat. Stir frequently with a heatproof spatula so the cheese melts evenly and doesn’t scorch on the bottom — this takes about 4 to 6 minutes. Season the base: Sprinkle the dry ranch mix, onion powder, and cracked black pepper over the melted cream cheese, stirring to combine. Taste and adjust — the ranch mix carries salt, so you likely won’t need extra. Add the mix-ins: Remove the pot from heat and fold in the sliced green onion, shredded chicken, crumbled bacon and 1 cup of shredded cheddar until completely incorporated. The residual heat melts the cheddar and binds the filling into a spreadable consistency. Assemble the bottom layer: Arrange the bottom halves of the sliced Hawaiian rolls in the prepared baking dish so they fit snugly. Spread the chicken-and-cheese mixture evenly over the bottoms, pressing gently so the mixture nests into the rolls. Top and finish: Sprinkle the remaining 1 1/2 cups shredded cheddar evenly over the filling. Place the top halves of the rolls over the cheese, cover the dish with aluminum foil to prevent excessive browning, and bake for 25 minutes. Brown and rest: Remove the foil and bake an additional 5 to 8 minutes until the tops are golden and the cheese is bubbling. Brush the melted butter over the warm tops, then sprinkle with grated Parmesan and chopped chives. Let rest 5 minutes before slicing into individual sandwiches so the filling sets slightly.
You Must Know
- High in protein: with shredded chicken and bacon, each sandwich provides a satisfying protein boost suitable for hungry crowds.
- Storage: assembled and baked sliders can be refrigerated in an airtight container for up to 3 days; freeze portions for up to 3 months.
- Make-ahead: prepare the filling 24 hours in advance and keep chilled; assemble and bake shortly before serving for best texture.
- Reheat gently: cover with foil and warm at 325°F until heated through to prevent the rolls from drying out.
My favorite part about this dish is how forgiving it is — once you have the filling right, the rest is assembly and joyful waiting. On busy game nights I’ll double the filling and make two pans; they travel well and reheat without losing much of their charm. Friends have told me these are the best sliders they’ve had, and I love that one simple combination keeps bringing people to the table.
Storage Tips
Store leftover sandwiches in an airtight container in the refrigerator for up to 3 days. To freeze, wrap individual sliders tightly in plastic wrap and place in a freezer-safe bag for up to 3 months; thaw overnight in the refrigerator and reheat at 325°F covered with foil until warmed through. When reheating from fresh, keep aluminum foil on for the first part of warming to maintain moisture, then remove for the last 5 minutes to refresh any crispiness on the tops.
Ingredient Substitutions
If you’re avoiding pork, use turkey bacon or omit the bacon entirely and add extra smoked paprika for that smoky note. For a lighter version, swap half the cream cheese for plain Greek yogurt (note the filling will be slightly tangier and looser). Use Gouda or Monterey Jack for a milder melt, or pepper jack for heat. Gluten-free rolls can replace Hawaiian rolls — just be mindful that textures will differ slightly. If you want lower sodium, choose a low-salt ranch mix or make your own seasoning with dried herbs and reduced salt.
Serving Suggestions
Serve warm out of the oven with crisp, lightly dressed greens or pickled vegetables to cut through the richness. These sliders pair beautifully with a citrusy slaw, oven-roasted potato wedges, or a tray of fresh crudités. For a party, provide small plates and napkins — the gooey filling invites messy, happy eating. Garnish with extra chives or a sprinkle of smoked paprika for a finished look.
Cultural Background
While there’s no single origin story for these sliders, they’re rooted in American comfort-food traditions that combine convenience ingredients into shareable bites. The use of ranch seasoning and cream cheese nods to late 20th-century flavor trends, while Hawaiian rolls add a sweet-salty interplay popularized by quick-serve gatherings. These sliders represent a hybrid of potluck ingenuity and modern party food: simple, bold, and meant to be eaten with company.
Seasonal Adaptations
In summer swap the chives for fresh basil and add a handful of diced tomato on the side for freshness. In cooler months, stir in roasted red peppers or caramelized onions to the filling before baking for deeper, sweeter notes. For holiday gatherings, add a tablespoon of Dijon mustard to the filling and sprinkle toasted pecans over the tops for texture contrast.
Meal Prep Tips
Make the filling up to 24 hours ahead and refrigerate in a sealed container. When ready to serve, assemble in the baking dish and follow the baking times as written. If you’re preparing multiple pans, stagger baking so each dish finishes just before serving. Store leftovers in single-serving containers to make weekday lunches quick and satisfying.
These sandwiches are a reliable, feel-good crowd favorite that reward a small amount of prep with big returns. Whether you’re feeding a family or a tailgate crew, this recipe is easy to scale and always invites smiles — give it a try and make it your own with the variations suggested above.
Pro Tips
Soften cream cheese to room temperature before melting to ensure a smooth, lump-free filling.
Use rotisserie chicken to save time and add extra flavor without additional cooking.
If the filling seems too thick, add 1 to 2 tablespoons of milk to loosen it slightly before spreading.
Brush the tops with melted butter while still hot for better adhesion of the Parmesan and herbs.
To crisp the tops more, broil for 1 to 2 minutes at the end—watch carefully to avoid burning.
This nourishing crack chicken sandwiches recipe is sure to be a staple in your kitchen. Enjoy every moist, high protein slice — it is perfect for breakfast or as a wholesome snack any time.
Tags
Crack Chicken Sandwiches
This Crack Chicken Sandwiches recipe makes perfectly juicy, tender, and flavorful steak every time! Serve with potatoes and a side salad for an unforgettable dinner in under 30 minutes.
Ingredients
Filling
Topping
Buns
Instructions
Preheat and prepare dish
Preheat the oven to 350°F. Lightly spray a 9x13-inch baking dish with nonstick spray and set it aside.
Melt the cream cheese
Place the softened cream cheese into a 4- to 5-quart heavy-bottomed stockpot over medium heat. Stir frequently until completely melted, about 4 to 6 minutes, scraping the bottom to avoid scorching.
Season the base
Sprinkle the ranch mix, onion powder, and cracked black pepper over the melted cream cheese and stir to combine evenly.
Fold in mix-ins
Remove the pot from heat and stir in the sliced green onion, shredded chicken, crumbled bacon and 1 cup shredded cheddar until fully incorporated and spreadable.
Assemble on rolls
Place the bottom halves of the Hawaiian rolls into the prepared baking dish. Spread the chicken mixture evenly over the bottoms and sprinkle the remaining 1 1/2 cups shredded cheddar on top.
Top with roll halves
Lay the top halves of the rolls over the cheese, cover the dish with aluminum foil and bake for 25 minutes at 350°F.
Finish baking and garnish
Remove the foil and bake an additional 5 to 8 minutes until golden. Brush melted butter over the tops, then sprinkle with Parmesan and chopped chives. Let rest 5 minutes before cutting.
Last Step: Please leave a rating and comment letting us know how you liked this recipe! This helps our business to thrive and continue providing free, high-quality recipes for you.
Nutrition
Did You Make This?
Leave a comment & rating below or tag
@forkelle on social media!
Categories:
You might also like...

Marshmallow Frosted Chocolate Brownies
Thick, fudgy chocolate chunk brownies crowned with gooey mini marshmallows and a quick-set chocolate frosting for an irresistible, crowd-pleasing treat.

Buttery Pecan Pie Bars
Buttery shortbread meets a gooey, brown-sugar pecan topping in these quick pecan pie bars. Just 10 minutes to prep and perfect for sharing.

Failproof Pumpkin Cheesecake
Silky, crack-free pumpkin cheesecake with warm spice, buttery graham crust, and optional caramel and rum-kissed whipped cream. Your effortless holiday showstopper.
Did You Make This?
Leave a comment & rating below or tag @forkelle on social media!
Rate This Recipe
Share This Recipe
Enjoyed this recipe? Share it with friends and family, and don't forget to leave a review!
Comments (1)
This recipe looks amazing! Can't wait to try it.
Comments are stored locally in your browser. Server comments are displayed alongside your local comments.

Hi, I'm Abigail!
What's Popular

30-Minute Meals!
Join to receive our email series which contains a round-up of some of our quick and easy family favorite recipes.