
>>

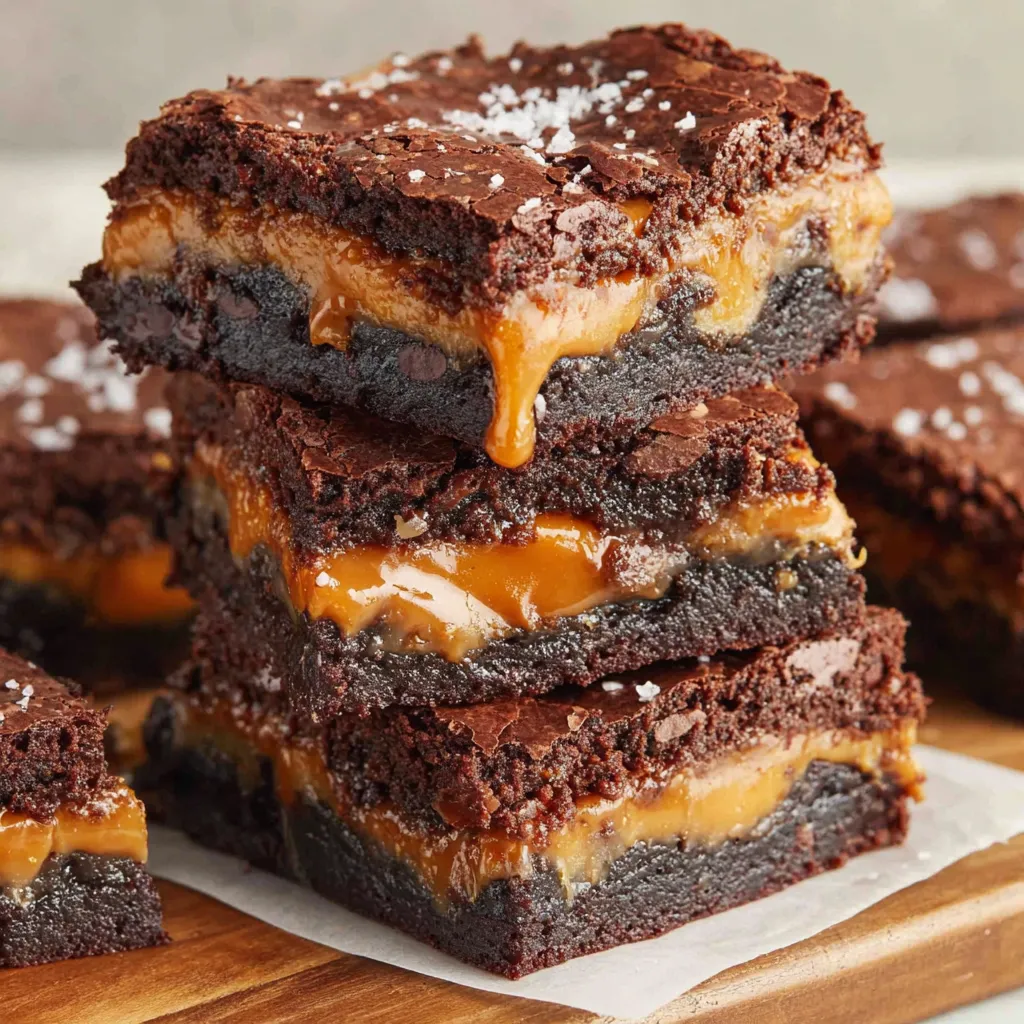
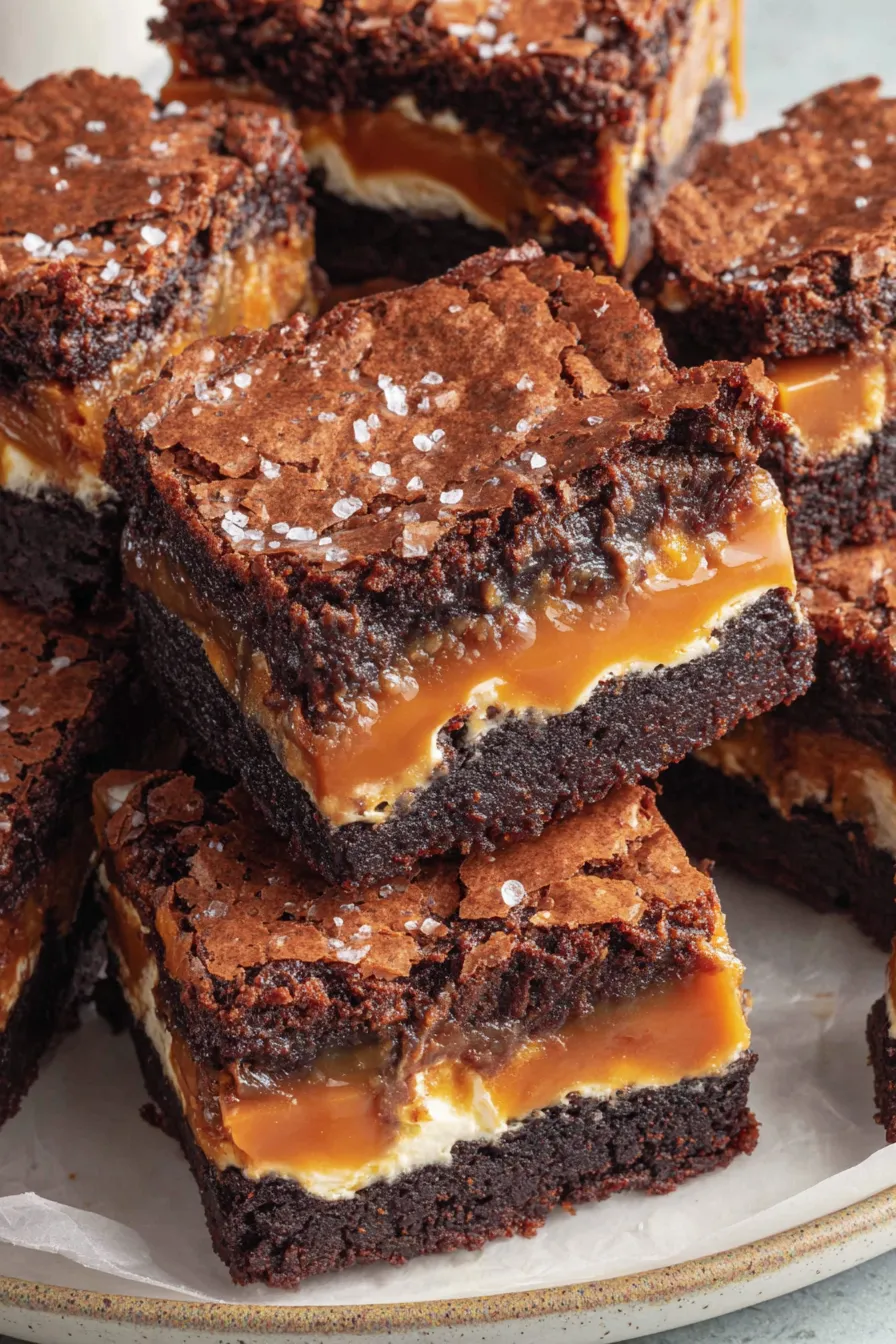
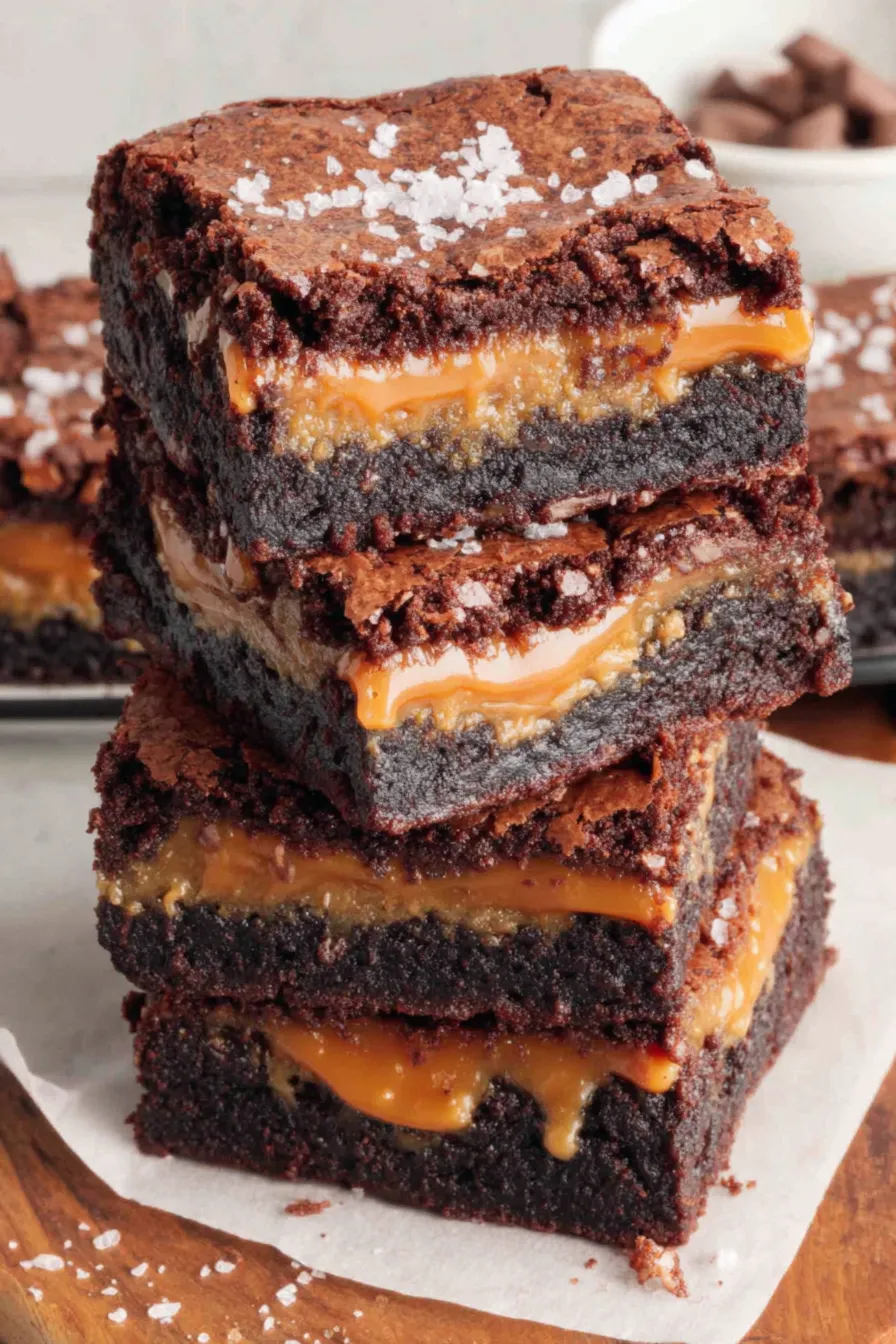
Decadent, fudgy squares layered with molten caramel — a crowd-pleasing treat that blends rich chocolate with buttery caramel and a sprinkle of flaky sea salt.
This caramel brownies recipe is my go-to indulgence when I want something that feels special but isn't fussy. I discovered this combination on a rainy weekend when I wanted to transform pantry staples into something that would bring everyone together. The first batch I made disappeared in minutes: chewy edges, a dense, fudgy center, ribbons of warm caramel that pulled threads as you lifted a fork. Since that day, these squares have appeared at birthday parties, potlucks, and cozy Sunday afternoons with coffee.
What makes this version stand out is the balance between bittersweet cocoa and the sweet, creamy caramel layer. The chocolate base is rich but not overly sweet thanks to a touch of unsweetened cocoa and brown sugar, while the condensed milk–caramel swirl adds that sticky, luxurious pull we all love. A final sprinkle of flaky sea salt (optional, but highly recommended) cuts through the sweetness and makes each bite sing. These are the kind of treats that earn second helpings and smiles around the table.
I remember cutting the first tray into uneven squares and handing them to my skeptical teenager — one bite and a suspicious frown turned into a slow blink of approval, then a second piece. The caramel pulls and the crunch of the top crust always gets compliments; it's become the recipe I take when I want to make an impression without fuss.
My favorite aspect is how simple technique yields restaurant-worthy texture: the contrast of a thin crackly top, fudgy interior, and molten caramel takes ordinary ingredients to extraordinary results. I once brought a pan to a neighborhood gathering and watched someone go back three times before admitting they were full — that kind of reaction never gets old.
Store at room temperature in a shallow airtight container layered between parchment to prevent sticking; they should hold for up to four days. If your kitchen is warm, store in the refrigerator and bring to room temperature before serving to soften the caramel. To freeze, cut into squares and flash-freeze on a baking sheet for an hour, then wrap each piece in plastic and foil. Thaw overnight in the refrigerator or at room temperature for a few hours; reheat briefly in a low oven or microwave for a warm, gooey treat.
If you need to swap ingredients, choose equivalents that maintain texture: use dark brown sugar for a deeper molasses flavor, or substitute half the all-purpose flour with cake flour for a slightly lighter crumb. To reduce sweetness, use bittersweet chocolate instead of semi-sweet chips. For a dairy-free version, replace butter with a firm coconut oil and use dairy-free caramel alternatives and sweetened condensed coconut milk — results will be slightly different but still delicious. Gluten-free flour blends can be used 1:1 in many cases, although the edges may be more delicate.
Serve slightly warm with a dollop of lightly whipped cream or a scoop of vanilla ice cream for contrast. For parties, cut into smaller bite-size squares and arrange on a platter with fresh berries to cut richness. These pair beautifully with bold coffee or a creamy latte and are excellent alongside a cheese plate when you want a sweet finish to a savory meal.
Brownies are an American classic with roots in late 19th-century North America. The addition of caramel ribbons echoes candy-making traditions that emphasize layered confections and contrast in textures. This mash-up celebrates the American love of combining familiar sweets into one over-the-top dessert — think of it as a nostalgic riff on classic caramel and chocolate pairings.
In autumn, fold 1/2 teaspoon of pumpkin pie spice into the batter for warmth, or scatter toasted pecans across the caramel for a harvest feel. For the holidays, swap in peppermint extract and crushed candy canes on top. In summer, top with toasted coconut and lime zest for a brighter finish. Small tweaks transform the same basic method into seasonal variations year-round.
Make the caramel and chocolate base a day ahead: keep the caramel in a sealed jar and the unbaked slab chilled; assemble and bake the next day to save time. For gifting, bake, cool, and wrap individual squares in parchment tied with twine — they travel well and look homemade in a good way. When stacking for storage, use parchment between layers to avoid sticking.
These caramel brownies have become a staple for gatherings, and I hope you enjoy making them as much as we do. Treat them as a canvas: once you master the basic method, the possibilities are endless.
Use room-temperature eggs for better incorporation and a more even texture.
Warm the condensed milk slowly over medium-low heat and stir constantly to avoid scorching when melting the caramels.
Check for doneness at 35 minutes; moist crumbs on a toothpick indicate fudgy centers, while a cleaner pick means more set bars.
Line the pan with parchment and leave an overhang to lift the slab out easily for neat cutting.
If you want extra caramel on top, save 1/3 of the sauce to drizzle after cooling so it doesn’t sink into the batter while baking.
This nourishing caramel brownies recipe is sure to be a staple in your kitchen. Enjoy every moist, high protein slice — it is perfect for breakfast or as a wholesome snack any time.
Yes — store in an airtight container at room temperature for up to 4 days; refrigerate if your kitchen is hot.
Freeze wrapped squares for up to 3 months; thaw overnight in the refrigerator before serving.
This Caramel Brownies recipe makes perfectly juicy, tender, and flavorful steak every time! Serve with potatoes and a side salad for an unforgettable dinner in under 30 minutes.
Preheat the oven to 350°F. Grease an 8 x 8-inch pan and line with parchment, leaving an overhang for easy removal.
Whisk the melted butter and cocoa powder until smooth. Add both sugars, eggs, vanilla, and 1/2 teaspoon salt; whisk until homogeneous.
Stir in the flour just until combined, then fold in the semi-sweet chocolate chips to distribute evenly without overmixing.
Spread half of the batter into the prepared pan in an even layer using an offset spatula. Reserve the remainder for the top layer.
In a small saucepan over medium-low heat, warm the condensed milk for 2–3 minutes, stirring. Add caramels and 1/2 teaspoon salt, stirring until fully melted and smooth. Remove from heat.
Pour about two-thirds of the caramel over the batter. Dollop remaining batter on top and gently swirl for a marbled effect.
Bake 35–45 minutes depending on desired fudginess. Edges should be set and center slightly soft; a toothpick will show moist crumbs for gooey centers.
Cool completely on a wire rack. Drizzle with reserved caramel sauce and sprinkle flaky sea salt if desired. Slice into squares and serve.
Last Step: Please leave a rating and comment letting us know how you liked this recipe! This helps our business to thrive and continue providing free, high-quality recipes for you.
Leave a comment & rating below or tag
@forkelle on social media!

Thick, fudgy chocolate chunk brownies crowned with gooey mini marshmallows and a quick-set chocolate frosting for an irresistible, crowd-pleasing treat.

Buttery shortbread meets a gooey, brown-sugar pecan topping in these quick pecan pie bars. Just 10 minutes to prep and perfect for sharing.

Silky, crack-free pumpkin cheesecake with warm spice, buttery graham crust, and optional caramel and rum-kissed whipped cream. Your effortless holiday showstopper.
Leave a comment & rating below or tag @forkelle on social media!
Enjoyed this recipe? Share it with friends and family, and don't forget to leave a review!
This recipe looks amazing! Can't wait to try it.
Comments are stored locally in your browser. Server comments are displayed alongside your local comments.

Join to receive our email series which contains a round-up of some of our quick and easy family favorite recipes.
